
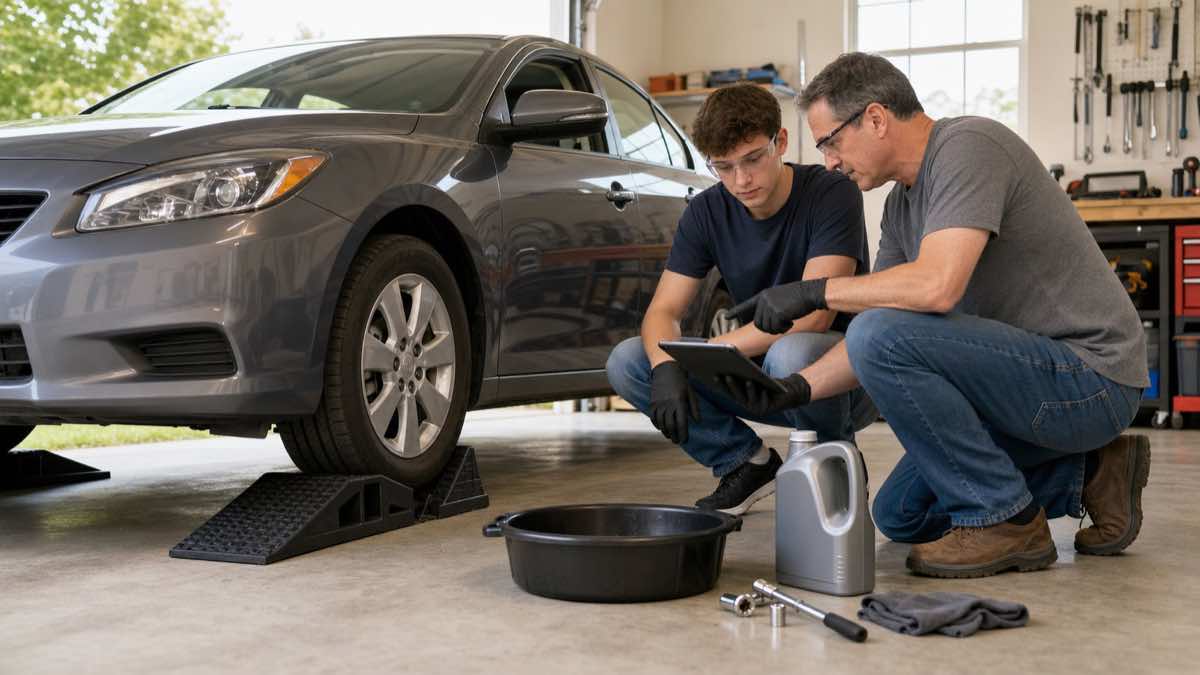
Yes, many beginners can change their own oil, but the job is only beginner-friendly when the vehicle, workspace, tools, instructions, and support method are suitable. Draining and refilling oil is not the hardest part. Correctly identifying the drain plug, supporting the vehicle, choosing the exact oil and filter, tightening components properly, and verifying the final level are what make the job safe.
Your first oil change should not be a race or a test of confidence. Read the vehicle-specific procedure before buying supplies, work with an experienced helper if possible, and be willing to stop. Paying a shop is the better decision when access is poor, specifications are unclear, fasteners are damaged, or you cannot support the vehicle safely.
Quick Answer: Is a DIY Oil Change Beginner-Friendly?
A conventional oil change can be a reasonable first maintenance task if all of these statements are true:
- You have the owner’s manual or reliable service information for the exact year, engine, and drivetrain.
- You know the required oil viscosity, performance specification, capacity, filter, drain-plug washer, tightening specification, and oil-level procedure.
- You can reach the filter and drain point without unsafe lifting or improvisation.
- You have level, solid ground; adequate light; eye protection; gloves; and enough uninterrupted time.
- You can safely contain, transport, and recycle the used oil.
- You have another transportation option if a damaged plug, wrong part, or leak prevents completion.
If one of those conditions is missing, let a qualified shop handle this service while you learn. Watching the first change on your specific vehicle can be more useful than following a generic video that shows a different engine.
When a First DIY Oil Change Is a Poor Choice
Some vehicles make a simple service unexpectedly complex. An underbody shield may need careful removal, the filter may be hidden above hot exhaust parts, a cartridge housing may require a special socket and O-rings, or the engine may have more than one drain point. Other vehicles use electronic oil-level measurement or a manufacturer-specific refill check. If wet residue is already present, identify the likely system before opening anything; our car fluid leak color guide is a useful starting point, not a substitute for diagnosis.
- The car must be raised, but you do not have approved lift points, ramps, correctly rated jack stands, wheel chocks, or a stable paved surface.
- The drain plug or filter housing is already rounded, cracked, leaking, cross-threaded, or excessively tight.
- You cannot confidently distinguish the engine-oil drain from the transmission, differential, cooling, or other service points.
- The engine has a dry-sump system, multiple oil circuits, unusual priming requirements, or a procedure that calls for specialized diagnostic equipment.
- A skid plate, damaged splash shield, lowered suspension, or corrosion blocks safe access.
- You need the car immediately and have no plan for a wrong filter, missing seal, stripped thread, spill, or delayed parts delivery.
Never crawl under a vehicle supported only by a jack. Quaker State’s general oil-change procedure gives the same warning and recommends wheel chocks. A jack raises the car; correctly placed stands or suitable ramps support it. Your vehicle manual and support-equipment instructions take priority over generic advice.
What You Need Before Starting
| Item | Why it matters | What to verify |
|---|---|---|
| Correct engine oil | Protects the engine and emissions system | Viscosity, automaker specification, and quantity |
| Correct oil filter and seals | Prevents bypass, fit, and leak problems | Exact engine application; included O-rings or washer |
| Drain pan and sealed transport container | Contains oil without overflow or contamination | Capacity greater than the engine’s oil fill |
| Six-point socket or specified tool | Reduces fastener damage | Correct size and access angle |
| Torque wrench where specified | Helps apply the service-information value | Suitable range, units, and calibration condition |
| Filter tool if required | Removes the old filter or cap | Correct style and size for the housing |
| Funnel, rags, absorbent, gloves, and eye protection | Controls spills and exposure | All within reach before draining |
| Safe support equipment | Prevents vehicle movement or collapse | Correct rating, placement, surface, and instructions |
Do not assume that a parts catalog result is infallible. Compare the new filter with the old one before installation, including thread or cartridge dimensions, seal location, and bypass design where visible. Confirm the oil label meets the automaker’s required specification, not just the same viscosity grade.
How to Prepare for Your First Oil Change
- Read the complete vehicle-specific procedure. Identify access panels, lift points, drain location, filter type, capacity, tightening values, seal replacement, oil-level method, and maintenance-reminder reset.
- Inspect before buying supplies. Look for existing leaks, damaged fasteners, missing undertray hardware, and anything that changes the expected job.
- Choose a good work window. Allow at least two hours for a first attempt, even when experienced technicians finish much faster. Do not begin before work, a trip, rain, or darkness.
- Arrange supervision. An experienced person can check support placement, plug identification, filter fit, and final verification without doing the entire job for you.
- Plan used-oil recycling. Confirm a local collection location, accepted container, hours, and whether it accepts filters before opening the new oil.
- Create a stop plan. Know where you will get replacement hardware, who can help, and how the car will remain safely parked if the job cannot be completed.
The engine may need to be warm enough for oil to flow but not hot enough to burn you. Follow the vehicle procedure and allow exhaust, engine, and oil temperatures to become safe before reaching underneath. Wear eye protection because the drain stream can change direction as the plug comes out.
General Beginner Oil Change Workflow
This sequence is an overview, not a substitute for instructions for your exact vehicle.
1. Secure the vehicle and verify access
Park on a solid, level surface, select Park or the appropriate gear, apply the parking brake, and chock the wheels as directed. If lifting is required, use only approved points and correctly rated equipment. Once supported, test stability without placing any part of your body underneath. Stop if the surface, lift point, ramp position, or support feels uncertain.
2. Identify the oil drain and filter twice
Trace the drain point to the engine oil pan using vehicle-specific diagrams. Locate the filter and understand whether it is a spin-on canister or a cartridge housing. If the drain location does not match the procedure, do not loosen it. Accidentally draining a transmission and then overfilling the engine can damage both systems.
3. Drain the oil without damaging the plug
Position a pan with extra capacity and room for the initial stream. Loosen the correct plug with the specified tool, keeping your face and hands away from the flow. Inspect the plug, threads, and sealing washer. Replace the washer when required. If threads are damaged or metal comes out with the plug, stop and get a professional repair rather than forcing it back in.
4. Replace the filter and every required seal
Move the drain pan beneath the filter area. After removing a spin-on filter, confirm its old rubber gasket came off with it; installing a new filter over a stuck old gasket can cause a rapid leak. For a cartridge filter, replace and position each O-ring exactly as the service procedure shows. Lubricate seals only with the specified fluid and tighten by the filter or manufacturer instructions.
5. Reinstall the drain plug correctly
Start the plug by hand for several turns so it is not cross-threaded. Tighten it to the vehicle’s specified value using the stated units and procedure. More force is not safer: overtightening can strip an oil pan or damage a plug, while insufficient tightening can allow a leak.
6. Refill gradually with the correct oil
Confirm the drain plug and filter are installed before pouring. Add somewhat less than the published capacity initially because residual oil, filter size, engine design, and service method can affect the final amount. Replace the fill cap, then follow the manufacturer process for starting, circulating, waiting, and checking the level. Do not guess when the car uses an electronic measurement routine.
7. Start, inspect, shut down, and recheck
Start the engine while watching the oil-pressure indicator. It should behave as the owner’s manual describes. If the warning remains on, the engine becomes noisy, or oil pours or drips from the plug or filter, shut the engine off immediately. Do not drive with an oil-pressure warning.
After the specified settling time, check the oil on level ground using the correct dipstick or electronic procedure. Adjust in small amounts and avoid overfilling. Reinstall the undertray and all hardware only after the leak inspection is complete. Reset the maintenance reminder only after the service has actually been verified, and do not confuse it with a fault or safety indicator covered in our dashboard warning lights guide.
The Five Checks That Make or Break a First Oil Change
- Correct drain: You positively identified the engine-oil drain before loosening anything.
- Correct sealing: The plug has its required washer, and the old filter gasket or O-rings were removed.
- Correct tightening: The plug, filter, and housing follow vehicle and part instructions without guessing or overtightening.
- Correct level: The final reading uses the required temperature, settling time, vehicle position, and measurement method.
- No active leak: You checked while running, after shutdown, after a short drive, and again after the car sat.
Put clean cardboard beneath the engine overnight after the first change. Recheck the level and inspect the plug and filter area the next day without crawling under an unsupported vehicle. A falling level, fresh spot, burning-oil smell, smoke, or warning light needs prompt investigation.
Used Oil, Filter, and Spill Cleanup
Used motor oil does not belong on the ground, in a drain, or in household liquid waste. The EPA’s used-oil guidance recommends eye protection and oil-resistant gloves, keeping used oil separate from water, antifreeze, solvents, paint, and pesticides, and taking it to an appropriate collection facility. State requirements and local acceptance rules can be stricter.
- Transfer cooled used oil into a clean, compatible container with a secure lid.
- Label it and keep it upright in secondary containment during storage and transport.
- Do not mix other automotive fluids into the oil.
- Drain and package the used filter according to local collection rules.
- Use absorbent promptly for spills and follow local rules for contaminated cleanup material.
Record Your DIY Maintenance
Keep the date, mileage, oil brand and exact specification, quantity, filter part number, washer or seal details, and receipts. Photograph the odometer, supplies, and completed level check. Record any leak, stripped fastener, abnormal debris, or top-up. Good records help with interval planning, resale, troubleshooting, and warranty discussions, although documentation does not change the terms of a warranty.
Follow the manufacturer interval for the actual vehicle and operating conditions rather than a universal mileage rule. Oil-life monitors are useful only when reset after a completed service and used as the manufacturer intends.
DIY or Shop: A Practical Decision
| Choose DIY when | Choose a shop when |
|---|---|
| The procedure is clear and access is safe | Safe support or access is uncertain |
| You have exact parts, specifications, and tools | Parts or tightening data are ambiguous |
| Fasteners and filter housing are undamaged | Threads, housing, plug, or undertray are damaged |
| You have time, help, and a backup plan | You need the vehicle immediately |
| You can recycle oil and clean spills responsibly | Local disposal or workspace rules prevent the job |
DIY is not automatically cheaper after buying ramps or stands, a drain pan, sockets, a torque wrench, filter tools, cleanup materials, and replacement hardware. Those tools can pay off over repeated services, but the first change should be judged on safety and correct work rather than savings alone.
Frequently Asked Questions
How hard is it to change your own oil for the first time?
The basic sequence is manageable for many beginners, but difficulty varies widely by vehicle. Filter access, underbody panels, lift requirements, cartridge housings, damaged fasteners, and electronic oil-level procedures can turn a simple service into an advanced job.
How long should a beginner allow for an oil change?
Allow about two hours for the first attempt, plus time to research and obtain parts. The actual drain and refill may be faster, but safe setup, checking instructions, cleanup, leak inspection, and final level verification should not be rushed.
Can I change oil without lifting the car?
Some vehicles provide enough ground clearance or support an approved top-side extraction procedure, but many do not. Never force access or crawl under a car with inadequate clearance. Follow the exact vehicle procedure and use safe support if lifting is required.
Do I need a torque wrench for an oil change?
Use one when the vehicle procedure specifies a torque value and the tool is appropriate for that range. A torque wrench cannot repair dirty or damaged threads, and an incorrect unit or extension setup can still produce the wrong result.
What if the oil pressure light stays on after the change?
Shut the engine off immediately. Confirm the oil level using the correct procedure and inspect for a major leak without placing yourself under an unsafe vehicle. Do not keep restarting or drive the car; follow the stop steps in our oil pressure warning light guide and arrange professional diagnosis.
Can a beginner overfill the engine?
Yes. Published capacity is a planning figure, while the final level must be verified using the manufacturer’s measurement procedure. Add less than the full amount initially, allow the specified settling time, and top up in small increments.
Bottom Line
Beginners can change their own oil when the job is researched, accessible, properly supported, and verified. The best first attempt is supervised, unhurried, and backed by exact service information. If you cannot identify every service point, support the car safely, or confirm the final oil level and leak-free operation, choosing a shop is good judgment, not failure.