
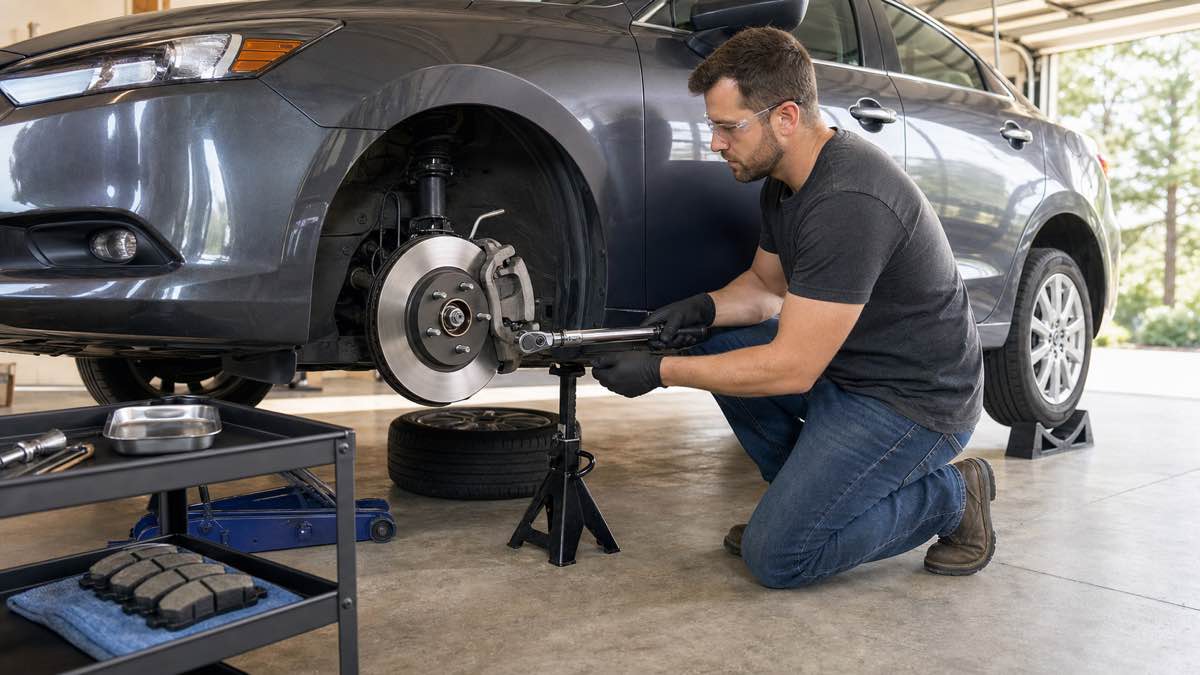
Can you replace brake pads yourself? Yes—if the vehicle has a straightforward disc-brake design, you have the exact service information, proper lifting equipment, a torque wrench, and enough experience to inspect and verify the entire brake assembly. It is not a good first solo repair when the vehicle has an electronic parking brake, brake-by-wire features, severe corrosion, damaged hydraulics, or an unexplained warning light.
Brake-pad replacement is more than swapping friction material. You must support the vehicle safely, confirm the correct parts, inspect both sides of the axle, measure or evaluate the rotors, check caliper movement, keep friction surfaces clean, tighten every fastener correctly, restore pedal pressure, and prove the car stops normally before returning to traffic.
Quick Answer: Should You DIY This Brake Job?
| Situation | DIY suitability | Why |
|---|---|---|
| Simple front disc brakes, exact manual, correct tools, experienced helper | Reasonable | Procedure and verification are manageable |
| First brake job with no experienced supervision | High caution | Small assembly errors can reduce stopping ability |
| Rear brakes with electronic parking brake | Vehicle-dependent | Service mode and piston procedure may be required |
| Soft or sinking pedal, fluid leak, low fluid, damaged hose | No | Hydraulic diagnosis and repair go beyond a pad swap |
| Seized caliper, broken bleeder, severe rust, damaged threads | No | Repair scope and risk have expanded |
| Hybrid/EV brake-by-wire or integrated brake system | Usually professional | Depressurization, scan tools, and special procedures may apply |
| Performance, carbon-ceramic, or multi-piece brakes | Specialist recommended | Expensive components and special handling or measurement |
If you cannot answer “yes” to every item in the readiness checklist below, having a qualified technician do the work is not failure. Brakes are the wrong system for learning through trial and error.
DIY Brake Pad Readiness Checklist
- I have the VIN-specific factory procedure or trusted service manual.
- I know the approved lift points and have correctly rated jack stands and wheel chocks.
- I have a calibrated torque wrench and the exact wheel, caliper, and bracket torque specifications.
- I can identify whether the rear electronic parking brake needs service mode.
- I know whether the piston compresses, rotates, or requires a scan-tool command.
- I can inspect rotor thickness, surface condition, and runout requirements.
- I can recognize a seized slide, damaged boot, leaking caliper, or unsafe hose.
- I have a plan to keep brake dust and chemicals controlled.
- I can stop the job and arrange professional repair if the scope changes.
- I can perform static and low-speed verification in a safe area.
Missing one torque value or guessing at an electronic parking-brake sequence is enough reason to pause. Procedures that look similar in videos can differ by axle, trim, caliper supplier, model year, and software configuration.
Tools and Supplies You Actually Need
- Vehicle-specific service information and correct replacement pads
- Floor jack, rated jack stands, wheel chocks, and a hard level work surface
- Socket and wrench set, breaker bar if appropriate, and calibrated torque wrench
- Correct piston compressor or rewind tool
- Caliper hanger or strong hook that will not damage the hose
- Brake-parts cleaner or the cleaning method specified for the vehicle
- Safety glasses, suitable gloves, and dust-control materials
- Micrometer or other specified rotor-measurement tools
- Approved brake lubricant for the exact contact points
- Clean container and material for proper waste disposal
You may also need new hardware, wear sensors, caliper or bracket bolts designated for one-time use, rotor retaining screws, a scan tool, or a brake-fluid handling method. Check before disassembly. Do not assume the pad box contains everything required.
Vehicle Support Is the First Safety Gate
Park on a hard, level surface. Select Park or the specified gear, shut the vehicle down, secure the key, and chock the wheels that remain on the ground. Follow the manufacturer’s parking-brake instruction; rear-brake work may require it to be released.
Lift only at approved points and support the vehicle with correctly rated stands in the specified locations. Never work on a vehicle supported only by a hydraulic jack, blocks, loose lumber, or unstable ground. OSHA accident records document fatal and severe injuries when vehicles shifted or fell during repair. Before removing a wheel, verify the supported vehicle is stable without putting your body underneath it.
Brake Dust and Chemical Safety
Do not blow brake dust with compressed air or sweep it with a dry brush. EPA guidance says some brake and clutch components may contain asbestos and cannot be identified reliably by sight. Compressed air can spread invisible dust through the work area and onto clothing.
Use the dust-control method described by EPA and applicable local rules, keep bystanders away, and dispose of contaminated material correctly. Wear eye protection and follow every cleaner and lubricant safety label. Never use gasoline as a cleaner, and keep oils, grease, and dirty gloves away from pad and rotor friction surfaces.
General Brake Pad Replacement Workflow
This overview explains the checkpoints, not the exact procedure for a specific car. Your service manual controls the order, fasteners, torque values, piston method, electronic parking-brake steps, and post-service routine.
- Confirm the diagnosis. Measure both inner and outer pad material and inspect the complete brake system.
- Verify parts and instructions. Match VIN, axle, rotor size, caliper type, wear sensor, and hardware.
- Prepare the vehicle. Secure power state, chock wheels, loosen wheel fasteners as specified, then lift and support safely.
- Document the original assembly. Photograph spring, clip, shim, sensor, and hose routing before removal.
- Remove the caliper correctly. Do not twist the hose or let the caliper hang by it.
- Inspect before installing. Check rotor, caliper, slides, boots, hose, hub, fasteners, and signs of heat or leakage.
- Retract the piston by the approved method. Monitor fluid level and follow electronic or hydraulic precautions.
- Install pads and hardware. Use lubricant only at the specified metal contact points and keep friction areas clean.
- Torque all fasteners. Use the specified sequence and replace one-time-use bolts where required.
- Repeat on the other side of the axle. Pads are serviced as an axle set, not one wheel at a time.
- Reinstall wheels correctly. Clean mating surfaces as specified and torque wheel fasteners in the proper pattern.
- Restore and verify. Exit service mode, pump the pedal, check fluid and warnings, then perform controlled testing.
Inspect the Rotors—Do Not Assume They Are Fine
New pads need a rotor surface that meets the vehicle’s specifications. Inspect for deep scoring, cracks, heavy corrosion, heat spots, thickness variation, and damage. Measure thickness at the specified locations and compare it with the minimum specification stamped on the rotor or listed in service information.
A rotor above minimum thickness can still cause pulsation or poor contact if it has excessive runout or thickness variation. Resurfacing is not appropriate for every rotor and cannot leave the part below its service limit. Replace or machine rotors according to the manufacturer’s procedure—not by appearance alone.
Check Calipers, Slides, Boots, and Hoses
Uneven inner-to-outer or left-to-right pad wear can reveal a sticking piston, seized slide, damaged hardware, restricted hose, or installation problem. Installing new pads without correcting the cause can overheat one wheel and destroy the new parts.
- Slides should move as specified without torn or displaced boots.
- The piston boot should not be cut, twisted, wet, or pulled out of place.
- The hose should not be cracked, leaking, stretched, kinked, or twisted.
- Bleeder screws and fluid connections should be dry and undamaged.
- Threads, brackets, pad abutments, and anti-rattle hardware must be sound.
Stop if you find fluid, a damaged hose, seized piston, broken bleeder, stripped thread, severe corrosion, or heat damage. That is no longer a simple pad replacement.
Electronic Parking Brakes Change the Job
Many vehicles with an electronic parking brake require a maintenance or brake-pad-change mode before rear-caliper service. Manufacturer instructions may require a scan tool, switch sequence, actuator disconnection, specific piston rotation, or initialization after assembly.
Forcing an electronic rear piston with a generic clamp can damage the actuator, caliper, or control system. A parking-brake warning after service is not something to ignore. If you do not have the exact procedure and equipment, have the rear brakes serviced professionally.
Do You Need to Bleed the Brakes?
A basic pad change normally does not require opening the hydraulic system. If you disconnect a hose, open a bleeder, replace a caliper, let the reservoir run low, or introduce air, the job requires the correct bleeding procedure. Some ABS, hybrid, and brake-by-wire systems need a scan tool or defined depressurization and activation sequence.
A soft or sinking pedal before the repair is not a normal “pads only” symptom. Diagnose leaks, air, fluid condition, master-cylinder problems, caliper faults, and brake-control issues before replacing pads. Do not road-test a vehicle with an abnormal pedal.
Post-Installation Checks Before Moving the Car
- Confirm every caliper, bracket, sensor, and wheel fastener was installed and torqued.
- Verify hoses and wiring are routed without twists, tension, or contact.
- Check the brake-fluid level using the specified fluid and procedure.
- With the vehicle stationary, press the pedal repeatedly until it becomes normal and firm.
- Restore electronic parking-brake operation and exit maintenance mode.
- Confirm brake and ABS warnings complete their normal self-check.
- Look for leaks and confirm each wheel rotates or releases as expected.
The first pedal push after piston retraction may travel much farther than normal. Pumping the pedal before moving seats the pads against the rotors. Forgetting this step can leave little immediate braking when the car first rolls.
Controlled Test and Pad Bedding
Begin with a stationary pedal hold, then test at walking speed in a private, clear area. Confirm normal pedal feel, stopping, release, parking-brake operation, and no leaks or warning lights. Increase speed only after the brakes behave correctly.
Follow the pad or vehicle manufacturer’s bedding procedure. Bedding transfers a controlled layer of pad material to the rotor; the required stops and cooldown vary. Hard panic-style stops on public roads are not a safe substitute. After the test, check for abnormal heat, odor, pulling, noise, loose hardware, or fluid leakage.
Common DIY Brake Pad Mistakes
- Working under or beside a car supported only by a jack
- Buying pads without matching the VIN, axle, rotor, and caliper
- Replacing only one wheel instead of both sides of the axle
- Ignoring the inner pad, rotor measurements, or uneven wear
- Letting the caliper hang from the brake hose
- Using the wrong piston tool or skipping electronic parking-brake service mode
- Putting grease on pad or rotor friction surfaces
- Reusing one-time bolts or guessing torque values
- Using compressed air to blow away brake dust
- Failing to pump the pedal before the car moves
- Road-testing despite a soft pedal, leak, warning, or grinding
When a Mechanic Is the Better Choice
Choose professional service if you lack a safe workspace, stands, torque information, measurement tools, electronic parking-brake procedure, or a second transportation option if the car cannot be reassembled. Also stop for hydraulic faults, seized parts, severe rust, performance brakes, hybrid brake-by-wire systems, or uncertain diagnosis.
Before buying parts, confirm that pads are actually the problem with our signs you need new brake pads guide. If a red dashboard brake alert is present, use our brake warning light guide instead of assuming routine pad wear.
Frequently Asked Questions
Is replacing brake pads difficult for a beginner?
It can be. The physical steps may look simple, but safe lifting, inspection, electronic parking brakes, torque, rotor condition, and final verification make it a poor first unsupervised repair.
Can I replace brake pads without replacing rotors?
Sometimes. Rotors must meet thickness, surface, runout, and condition requirements. Measure and inspect them; do not decide by mileage or appearance alone.
Do I need a torque wrench for brake pads?
Yes. Caliper, bracket, and wheel fasteners have vehicle-specific torque requirements. Too loose can be dangerous, while overtightening can damage threads or components.
Should I replace pads on all four wheels?
Replace pads as a complete axle set—both front wheels or both rear wheels. You do not automatically need both axles unless inspection shows both are due.
Do brakes need bleeding after a pad change?
Normally not if the hydraulic system stays closed. Opening a line or bleeder, replacing a caliper, or introducing air requires the exact bleeding procedure.
Can I drive immediately after replacing brake pads?
Only after restoring a firm pedal, checking fluid and leaks, confirming warnings are clear, testing safely at very low speed, and completing the manufacturer’s bedding procedure.
Bottom Line
You can replace brake pads yourself when the design is straightforward and you can follow the exact procedure from lifting through verification. If you cannot safely support the vehicle, measure and inspect the components, handle electronic parking-brake requirements, torque every fastener, or diagnose an abnormal pedal, use a qualified mechanic. Saving labor is never worth uncertain stopping ability.